
As a child, I'd make mermaid costumes for my Barbies by putting a short skirt around their feet and taping seashell snap beads to their boobs. When I was plotting a costume for my first mermaid parade back in 2010, it was considerably more difficult. If I didn't need to walk, I probably would've just strapped a skirt around my ankles. Though even if a seashell bead was big enough for my bra, scotch tape was going no where near my nipples. I didn't want a mermaid style gown, and I didn't want my legs to be bursting out the middle of my tail. I wanted fins! I needed it to be clear that I was fish on the bottom. I briefly considered building some kind of wire-frame tail to cover with fabric, but then I found this Simplicity pattern:
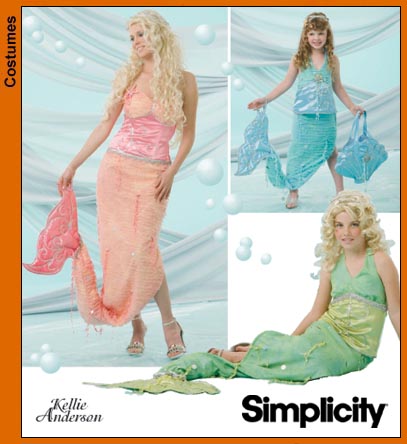
Genius! They made a skirt-like tail with an asymmetrical hem with a little strap to wear around your wrist. Since I like to make costumes with days (or hours) to spare, I didn't have time to order the pattern online or find it in a store. (Despite being the fashion capital of the world, it's really difficult to find new-ish patterns in NYC fabric stores. Though if you're ever looking to sew something a kindergarten teacher would wear in 1982, let me know. I have some hook ups). Instead, I made up a variation of this tail as I went.
To start, I made a skirt with two layers: shiny, translucent on top of sea green cotton. I put zipper in the side. Then I finished the hem on the cotton skirt to end several inches above my knees. Then I laid the skirt on the floor and cut the shiny layer at an angle, the bottom being the thinnest part. I turned under the fabric on each side and finished the hem to make sure my scales didn't come unraveled. I was originally drawn to sequined fabric when I was shopping for materials, but I decided this shiny green look more fish-like. To make the bottom fins, I found a photo online of a fish fin I like the shape of. Then I blew up the photo in Photoshop to make a giant stencil. I cut out two fins on the fold, giving me two full tails. I sewed them together, then turned the right sides out. Then, I folded some galvanized wire into the shape of each tail fin and pulled the fabric over the frame. Then I sewed it to the rest of the tail, it looked like this:

To finish the tail, I sewed on waistband that matched the fin fabric and I sewed a hand strap on toward the bottom, so I could easily swim home into the ocean:

As for my top half, I have short hair. Draping my hair over my shoulders ala the cleaned up Starbucks logo was not an option. I would've loved to use actual or scallop shells, but the size of shells you can buy in a fun pack in Party City would fit me more like pasties. Instead, I took some scraps from my tail fabric and cut out several circles. I sewed each one to a circle of the sea green cotton. After turning the circles right-side out, I folded them like a fan and ironed them into place. I did a gather stitch across the bottom of each circle to make the little scallop tail (probably not actually called a tail). Each circle made a half scallop, and I attached them together with hot glue. For the bra portion of my seashells, I sewed pieces of the black shiny fabric I used for the fins directly onto an old bra. I made a darted portion to slide over the actual cups, then sewed pieces to cover the rest of it. I can't explain my exact methodology for this; it involved sitting at my sewing machine in the wee hours of the morning frantically stitching and cutting. Then I hot glued the shells to the bra (and accidentally dripped hot glue down my torso in the process. This was still less painful than the time I burned my hip with a soldering iron).
While I was sewing, I assumed the back of the bra would loose some of its elasticity. I was right, but I underestimated how much elasticity. The finished seashell bra needed to stretch eight inches longer than it did to fasten. I added a piece of another old bra, but just ended up duct taping the bra together when I was running out the door.
My merman, Eric, made himself a pair of shiny green pants with bright blue
fins. He traced a pattern by using another pair of his pants. He sewed the legs by hand, and stitched in bright blue fins on each leg. I'm still amazed he had the patience to sew a whole pair of pants without a machine. (I did help him sew the crotch on the machine).


I sculpted them out of Model Magic, the fluffy Crayola modeling clay that air dries. I cut out two starfish shapes, then built up with the clay and moved the legs around to look natural. I painted them some acrylic paint. After they dried, I glued rhinestones along the legs in the middle, kind of like actual starfish spines. Then I glued them to the bra again. Eric made some updates to his costume too. He went over his pants with a sewing machine and spliced together a kelp necklace with some fabric scraps and rick rack.
No comments:
Post a Comment